Next article
Try us for free.
Awarded 2019
CIO Top 10 APAC Payment Solution Companies


Connecting to Xero: A Step By Step Guide
Pay Advantage works with Xero to offer you a number of beneficial features such as:
- Sharing customer data between Xero and Pay Advantage
- Adding a Pay Now button to your Xero invoices to accept credit card payments
- Accepting BPAY on your Xero invoices
- Automatic notification when invoices have been paid in Xero
In order to connect Pay Advantage and Xero you will need a Xero account and you will need to have a verified account with Pay Advantage. If you have a Xero account and you’ve been verified, you’re ready to go.
The first step to taking advantage of the benefits from integrating with Xero is to connect your Pay Advantage account. You need to make a connection between the two systems so they can talk to each other.
Step 1: Log into your Pay Advantage Dashboard
First log into your Pay Advantage dashboard. Don’t forget to have your mobile phone handy in case you need to enter a security code.
On the left-hand side of your dashboard you should see a menu item which says INTEGRATIONS (its underneath reports). Click on this menu item.
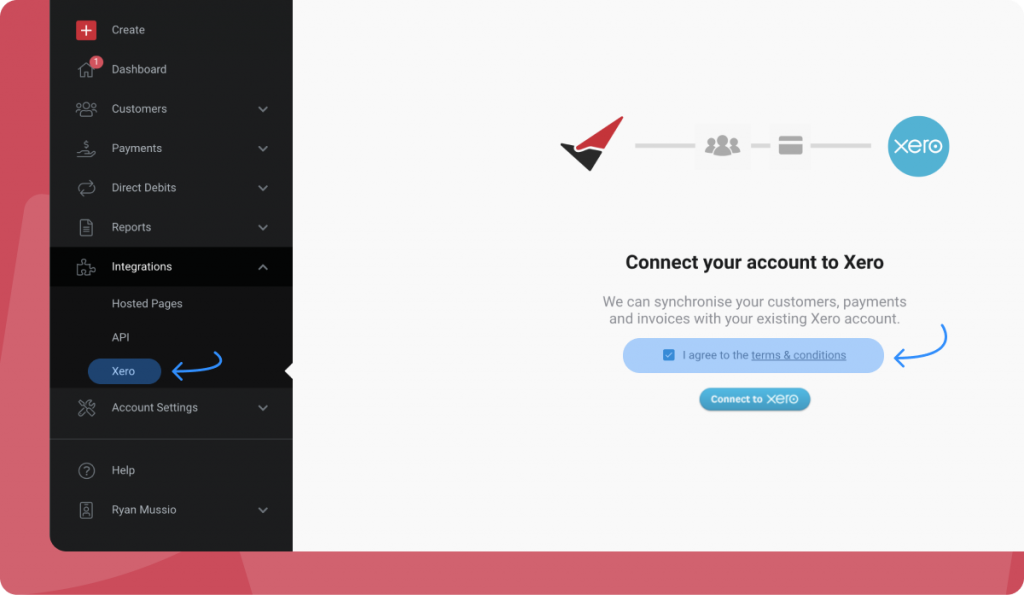
You will be taken to the Xero login page, where you will need to enter your Xero login details.
You’ll then be asked to ‘allow access’ by clicking the blue button which says ALLOW ACCESS.
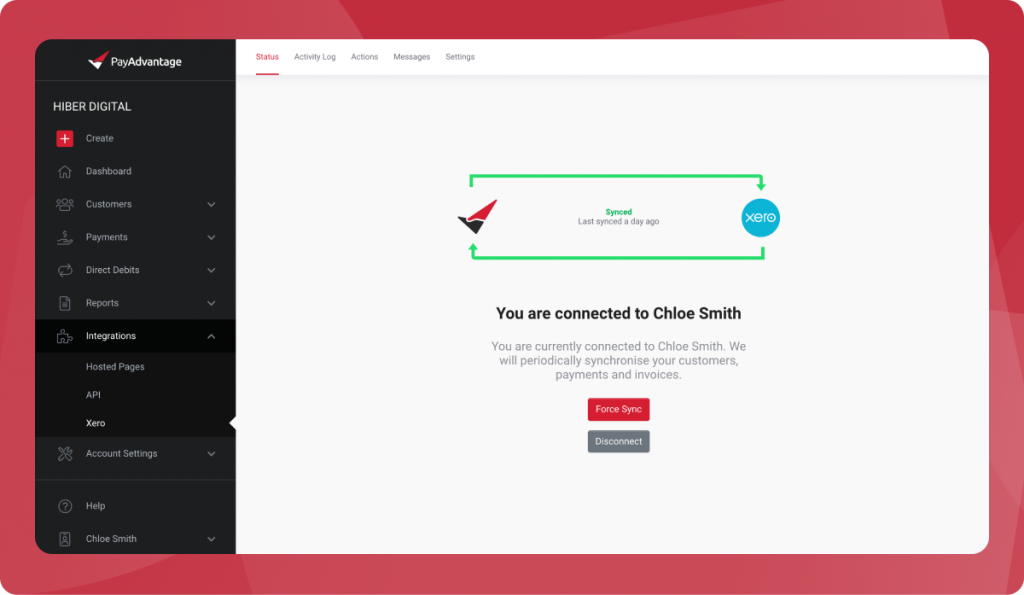
On your Pay Advantage dashboard you should now see green arrows connecting the Pay Advantage logo and the Xero logo – this confirms your Pay Advantage account is connected to Xero. If you don’t see the green arrows, try step 1 and 2 again.
Step 3: Configure your Xero Integration
Next you’ll need to adjust some settings within both Pay Advantage and Xero to personalise your set up.
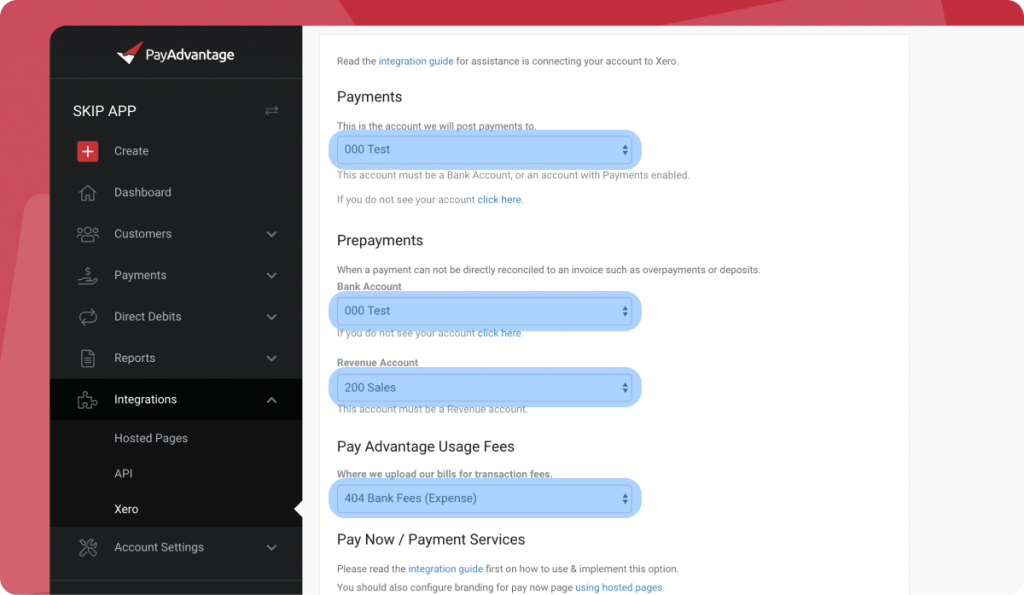
You will need to identify, in Pay Advantage, the correct business banking accounts that we should use to do things like deposit funds into your account.
Click on the SETTINGS menu item at the top of the page.
If you do not see your business banking accounts listed when you click the drop down menu under PAYMENTS, then you’ll need to configure a code for your bank accounts in Xero.
Return to Xero, make sure you’re signed in, then click on ACCOUNTING at the top of the page. Next up, click CHART OF ACCOUNTS under the ACCOUNTING menu.
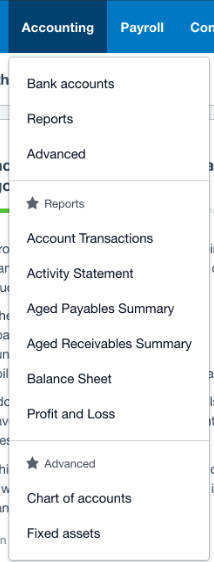
Under Chart of Accounts your business banking accounts should be listed if they were set-up correctly with Xero (if you don’t see them listed check out this Xero help article).
Give each account a code (limited to ten characters).
Next return to Pay Advantage and refresh the page. You should now see your bank accounts listed when you select the drop down menu that’s labelled Payments.
Under Payments, select the bank account you want payments to be transferred to from Pay Advantage (usually a business transaction account).
Then select an account for Prepayments, when a payment can not be directly reconciled to an invoice, such as overpayments or deposits. Select a revenue account, and then select where you want Pay Advantage to upload bills for transaction fees.
Remember: If you don’t see a Bank Account listed you’ll need to return to Xero and assign the account a code under the Chart of Accounts section. If your not sure which accounts to use for each item check with your Accountant.
Once you’re happy with your nominated bank accounts, remember to hit the SAVE button at the bottom of the page.
You should now be connected to Xero and ready to offer your customers multiple payment methods through your Pay Advantage integration.